
Fleece Slipcovers for Recliners
Introduction
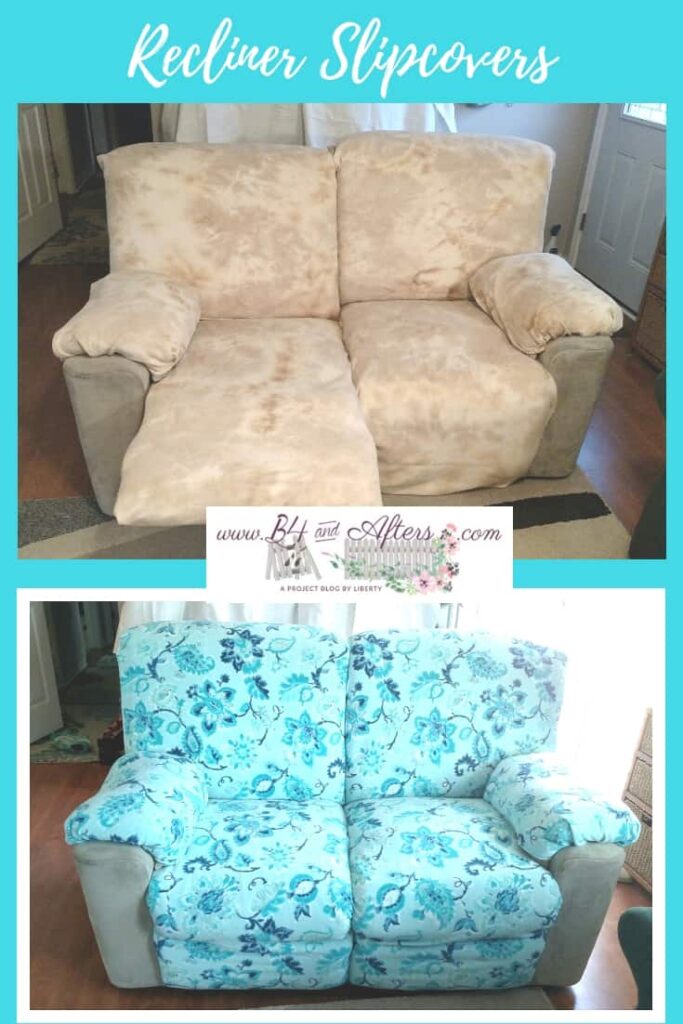
Eight years ago I had quickly made some slipcovers for my double recliners to protect them from small children with their eternally dirty fingers. I had chosen neutral colors, which just happened to be in fleece. I didn’t realize it then, but fleece has a nice stretch to it that is convenient for slipcovers. Those covers have worn well, and they have lasted longer than I expected. But they are worn, and I decided that it was time for some new ones. Here are the old ones:
Before, old recliner slipcovers

(*This post may contain affiliate links. By purchasing anything from these links, I may receive a small commission at no cost to you. More information is available on my Disclosure page.)
I went shopping intending to look for another neutral color– except in the gray family this time. However, the grays that I found looked a little cluttered. I decided that if it were going to be a busy pattern, then I might as well go for some color along with it, instead of gray. There was not enough yardage of the floral pattern that I chose, so I also purchased some coordinating plain fabric. The light blue/aqua is not fleece like the floral is– instead it is a soft, plush, kind of furry type of fabric– the kind that reminds you of a lightweight blanket.
Also Before

The four white strips are curtain tiebacks leftover from other sets.
If you would rather purchase slipcovers than make your own, you will find a good variety of them here.
Here is The Cat (who approves of my choices) as I try to decide how best to combine the plain fabric with the floral fabric when I sew my recliner slipcovers.

I had planned to just copy my previous “pattern,” which really wasn’t much of a pattern. It had worked out that the selvages were at the bottom edges of the top pieces, so I had not hemmed them. I was able to do that again for these new covers, which saved me some sewing.
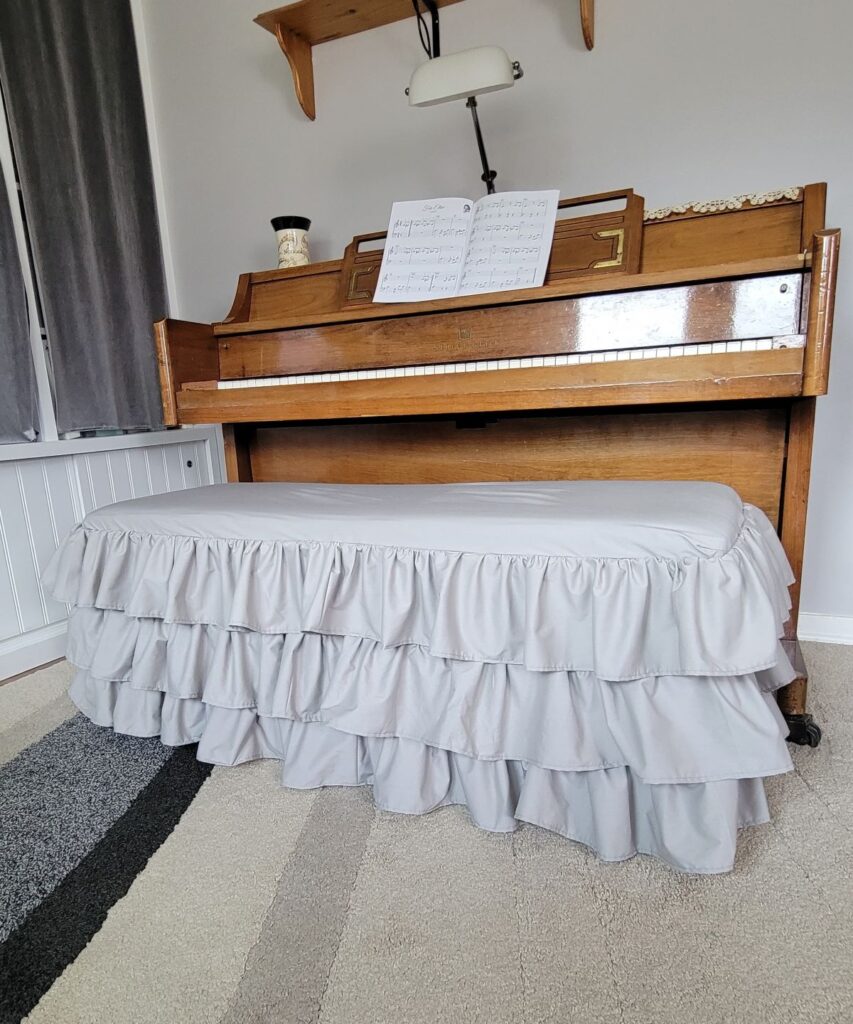
- Ruffled Piano Bench Cover
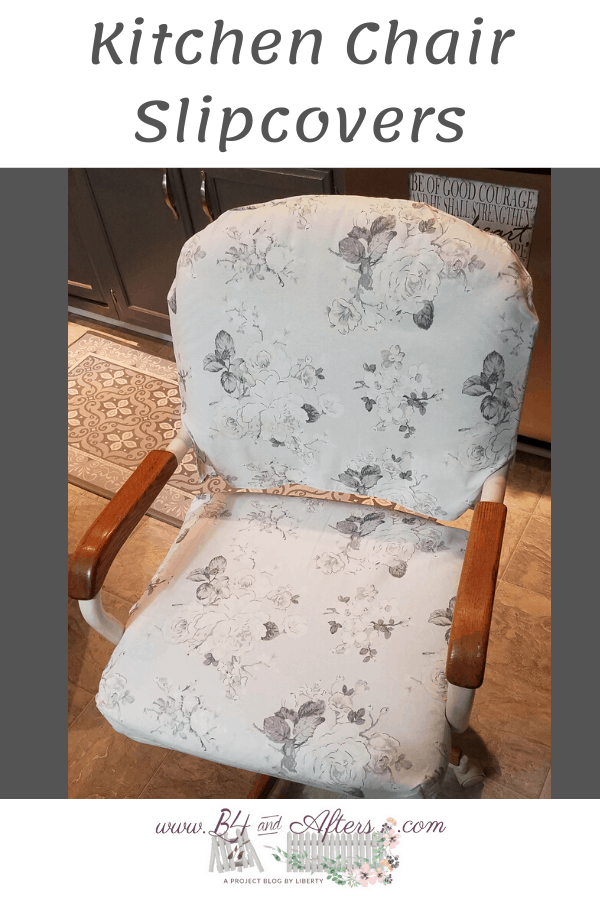
- Removable Kitchen Chair Slipcovers
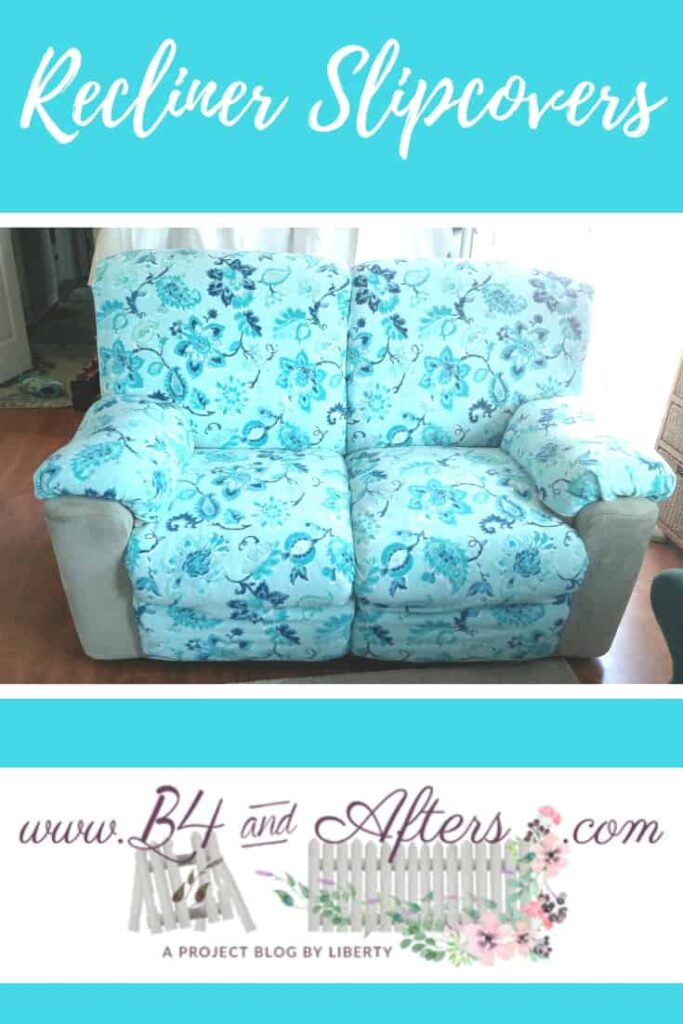
- Recliner Slipcovers
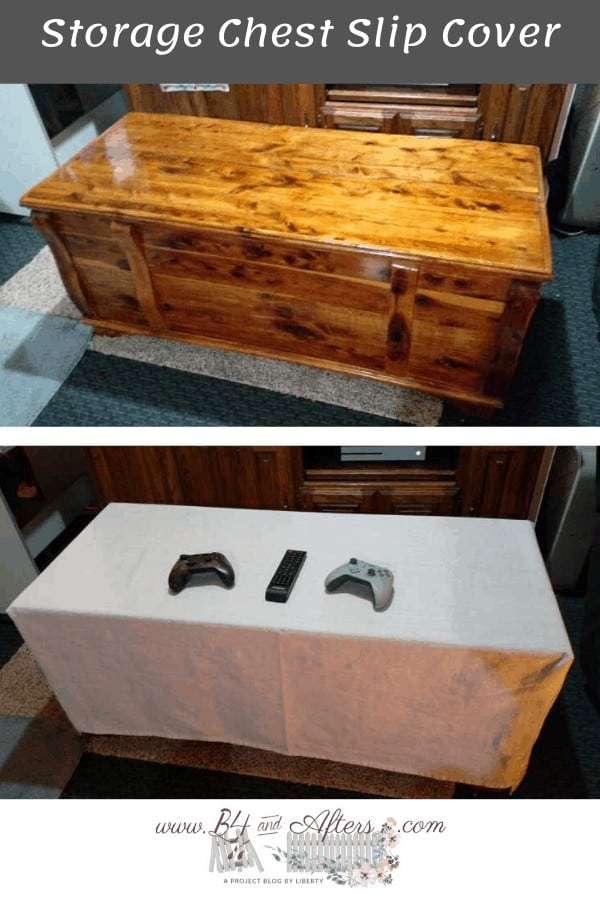
- Storage Chest Slipcover
I thought that I would try to make a few minor improvements. I was not satisfied with the different combinations of floral with the plain, until I realized that if I laid out the pieces in the opposite direction, that it just might be possible for me to use all floral on the front! Then I could use the plain fabric for the back.

A Sewing Tip
If you want to make your own slipcovers and do not have old ones to lay out over your new fabric– try cutting out some old fabric or an old sheet as a test piece first. I did that for my Kitchen Chair Slipcovers, and it helped so much!
Here is the new fabric just laid out– nothing is sewn yet, but the main cuts have been made!

And here is the fabric laid over the curve of the back, as I cut it off. (The armrests I have left as plain pieces of fabric, tucked in at the front and back. Fleece does not fray when cut. I may add some sort of trim later, but for now the armrests will stay as they are.)

The covers are a total of four pieces– two for each recliner. I worked on the bottom (seat and foot rest all in one) piece first. Again– the cat makes herself right at home in the middle of my project. : )

I pinned the tieback in place on the footrest area.

The tiebacks on each side will go between the hinges and then tie underneath to help hold it on.


I cut off the excess, and pinned in place the pocket for the bottom. The pocket will just slip on over the foot rest, with the tie (shown above) also helping to hold it in place as the foot rest is moved back and forth.

That bottom piece was easy. The top pieces took me awhile longer to figure out, since I had to piece the plain fabric to the floral fabric. Those two pieces were not equal, as I had curved the floral piece over the back. I had thought that I could just pin the plain fabric in place in one piece, but after a couple of failed tries and a lot of time, I had to try another method.
Failed Try

My original slipcover was not very professional– I had simply folded the fabric in half and sewn seams down the sides. See? With my new fabric, I thought that I would improve on the design and make the top piece longer– but that did not work at all.

Once I figured out that making the back slipcover longer was not a good design improvement, then I just had to get the dimensions right for the extra side pieces. It was a little tricky, since the front and back pieces were not equal. The extra side pieces were an excellent and most necessary improvement — and give the covers a much more professional look. Don’t you agree?

Here is the other side:

And here is the back:

AFTER!!

There was just enough leftover fabric to make a coordinating throw. I love how this turned out! The floral pattern does not make my living room look cluttered. It adds such a bright and cheery element. I am sooo glad that I went out of my comfort zone in choosing this fabric! It looks like I have a brand new piece of furniture! One of the best parts of that is that I spent less than $50 for this transformation!
New Recliner Slipcovers

What about you? Have you ever sewn slipcovers? Have you ever wanted to sew slipcovers? Do you think you will try it out?


Wow! That’s amazing that you can create those recliner covers! They can be made with any fabric or color, with your tutorial. Thanks for sharing on Homestyle Gathering!
You’re welcome Julie– I’m so glad that you like the covers!
Thank you for sharing at #ThursdayFavoriteThings. Pinned and shared.
Congratulations! Your post was my feature pick at #OverTheMoon this week. Each Hostess displays their own features so be sure to visit me on Sunday evening and to see your feature! I invite you to leave more links to be shared and commented upon. Please don’t forget to add your link numbers or post title so we can be sure to visit!
Oh Thank you! That’s so exciting! I appreciate it sooo much!